Since Ive recently picked up a new project and its gonna be carbed for now, Ive been looking online about how to take a regular carb and set it up for turbo, aka blowthrough.
I found this online and figured I would post it here with the pictures blown up instead of having to click on every single little link. But here is the original post website.
http://www.hangar18fabrication.com/blowthru.htmlSo you want to build a blowthrough setup, but have no idea how to setup the carb? Well, just follow the instructions and check out the reference pics and you will be well on your way. Please, read the entire article before modifying your carburetor so you have a full understanding of what needs to be done. Remember, if you modify your carb as per the following instructions, it will be set up for blowthrough, but not tuned for blowthrough. That part is up to you.
First, you’ll need a carb. For this article, we’ll be using a Holley 4150 Series 750 double pumper, pictured here.
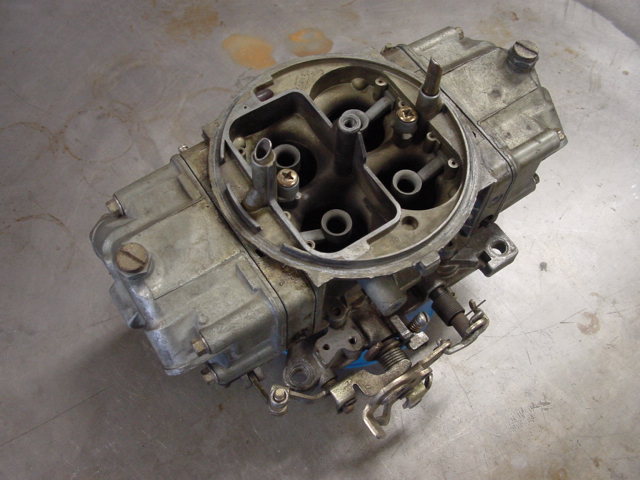
All the following modifications will work on any double pumper, regardless of size, from 600-850. They will also work on any Holley clone, like the Barry Grant “Claw†Series™ or Demon™ carburetors. Just because we’re using a Holley, doesn’t mean other carbs won’t work. Holley’s are just the most popular and easiest to modify four barrel, and parts are very easy to acquire. Speaking of parts, here is a list of parts, as well as tools, that you will need to modify your carburetor:
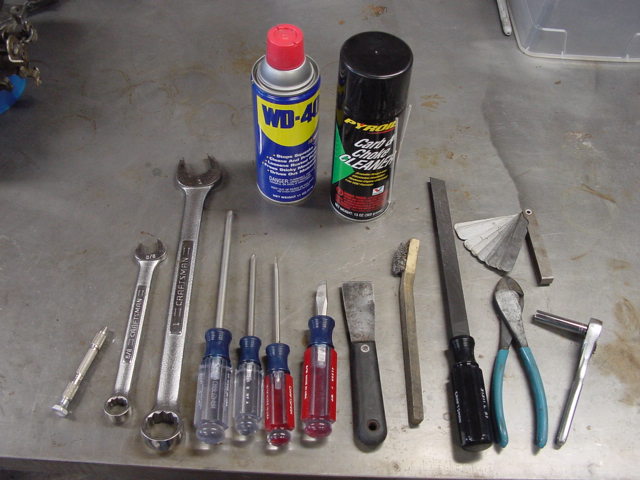
Tools: Parts: (parts with * are optional)
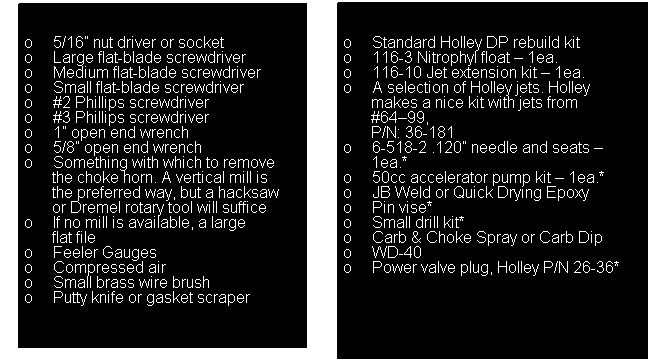
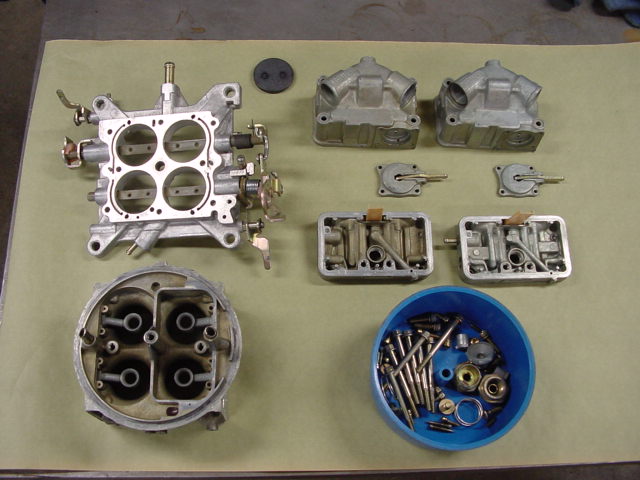
Now that we have all the tools and parts together, disassembly of the carburetor can begin. Keep all old gaskets for comparison with the new ones from the kit. Each kit will have gaskets for a few different models, and some of them are virtually identical to the untrained eye. First, make sure the carb is empty of fuel. Please, use common sense here people. Carburetors and their parts may be covered or saturated with fuel. Make sure you work on your carb away from heat, sparks or open flame . . . that also means no smoking!
Disassembly
First, remove the inlet fitting on each bowl.
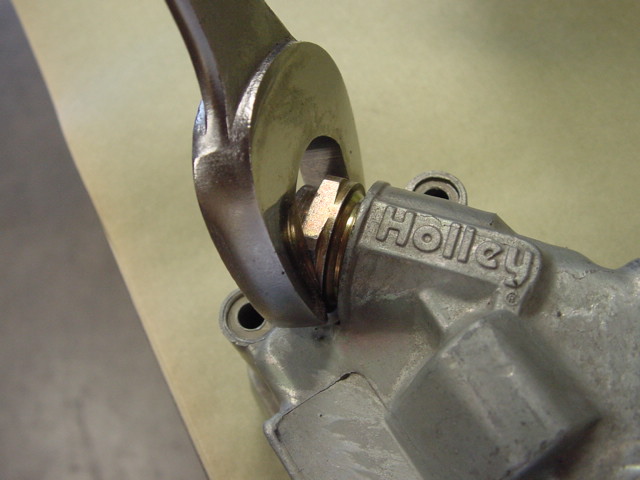
Then, remove the four 5/16†screws holding each bowl on.
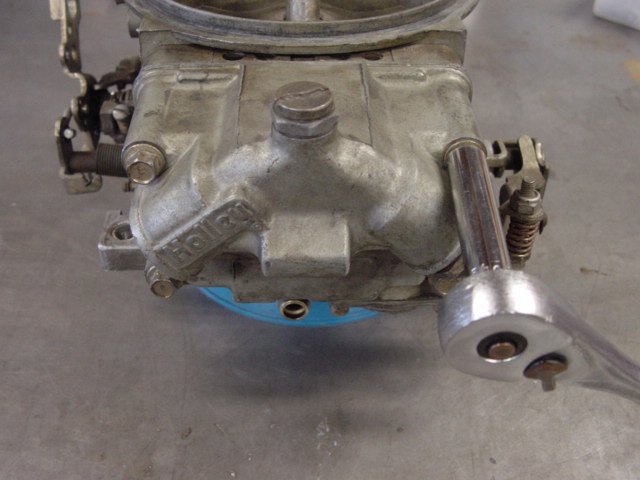
It’s nice to have an old pie tin or metal bowl to put screws and small parts in so they do not get lost. Next, remove the four screws holding the accelerator pump on each bowl with a #2 Phillips head screwdriver.
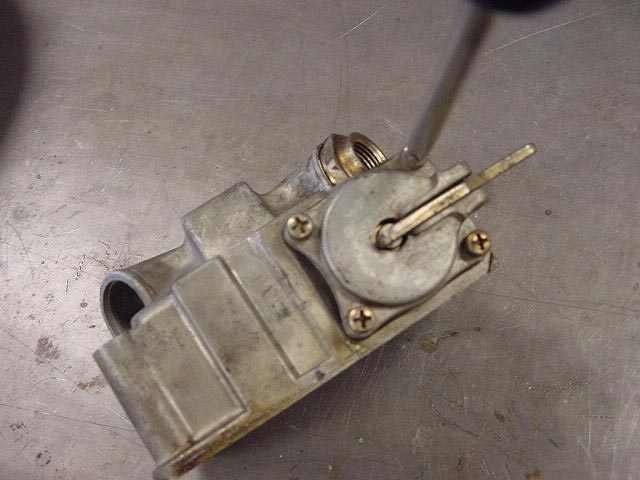
Remove the accelerator pump cover assembly, the diaphragm, and the spring underneath it. The pump will use one of two methods to pull fuel into the diaphragm. The older method involved a check ball. If your carb has a check ball in this area
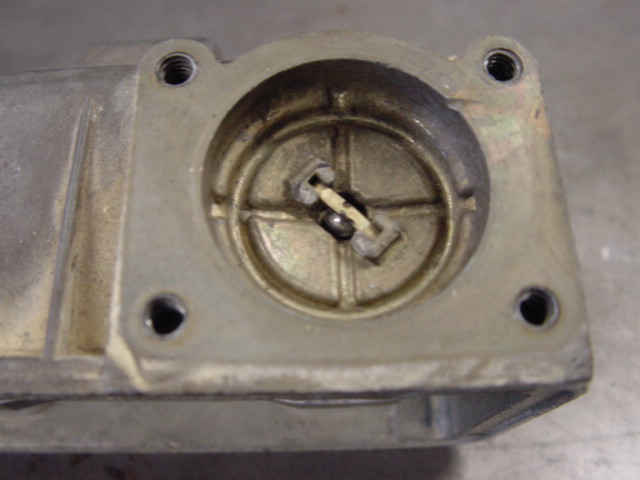
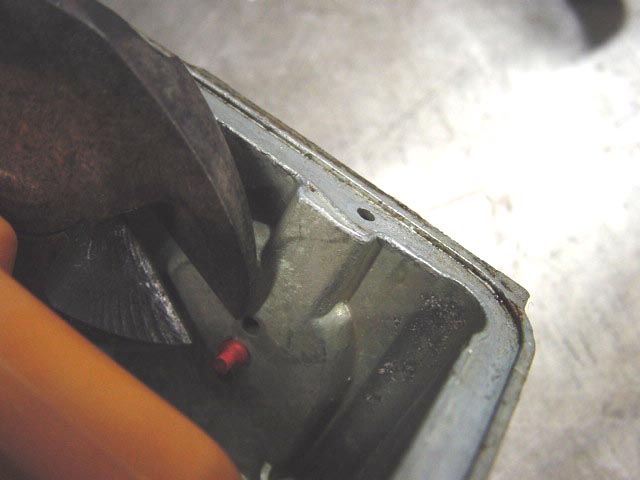
nothing further needs to be done. If you have the later type with a red/orange rubber umbrella seal,
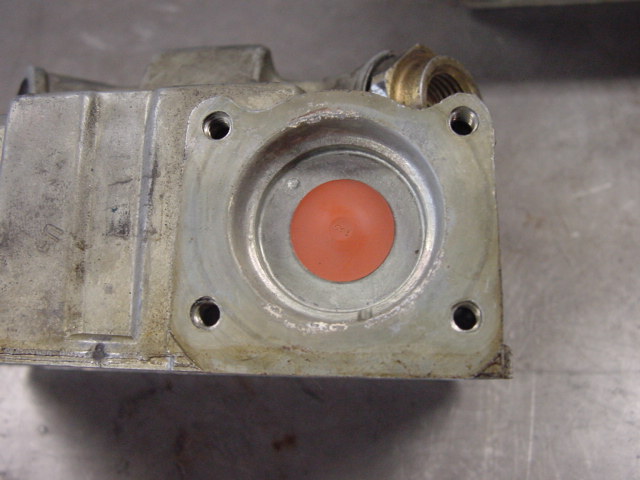
you will need to remove it. You can usually pull it off or cut the bulged end off inside the bowl and pull it through.
Next, loosen the large flat screw on top of the bowl with a large flat blade screwdriver. Using a 5/8 wrench, you can now unscrew the needle and seat assembly. Remove the large flat-head screw and adjusting nut from the needle and seat. Place the nut and screw with your other small parts. Now, remove the two screws holding the float assembly in place.
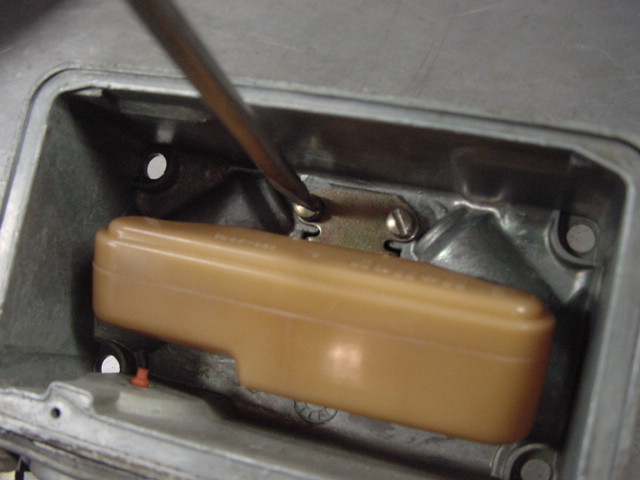
Make sure the cross pin holding the float and spring (if so equipped) does not slip out of place. You will be replacing the plastic (pictured) or brass float with the Nitrophyl floats later, and will need use the original as a reference. Repeat this for each bowl.
Next comes the metering blocks. You will probably have to pry the metering blocks off with a screwdriver. Remove the two idle mixture screws from the primary block, and from the secondary, if your carb is equipped with 4-corner idle.
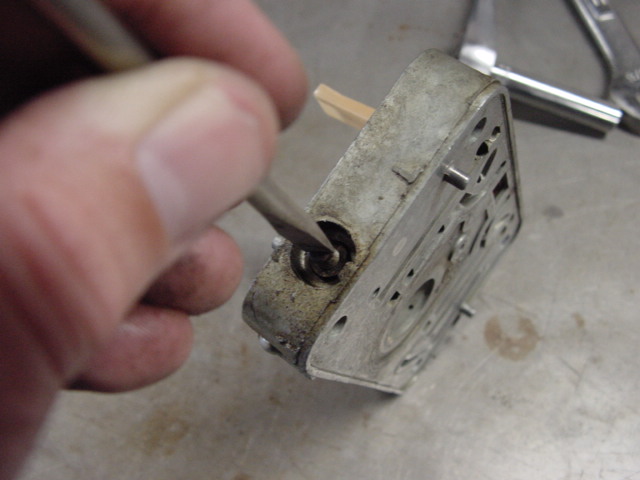
Then remove the power valve from the primary metering block.
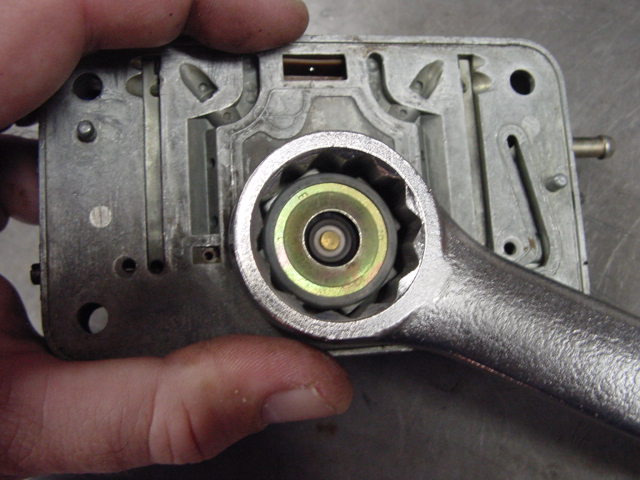
Some carbs are equipped with a secondary power valve. If this is the case, remove it as well. Finally, remove the jets in each metering block, noting which sizes are in the primary and secondary
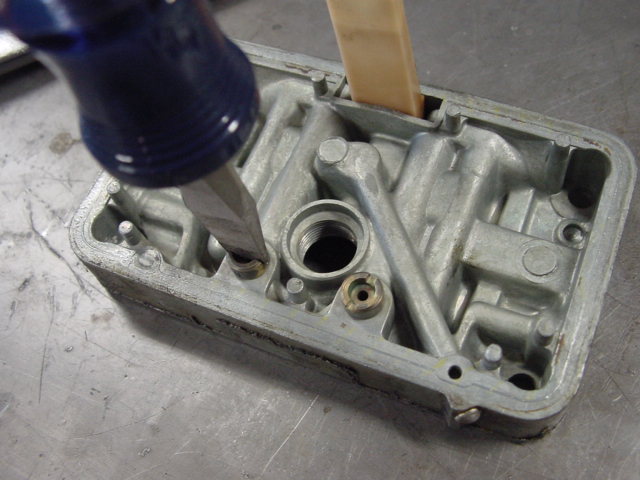
Now that the metering blocks are done, we can move on to the main body and throttle plate. Remove the primary squirter from the main body using a large Phillips screwdriver and note the size.
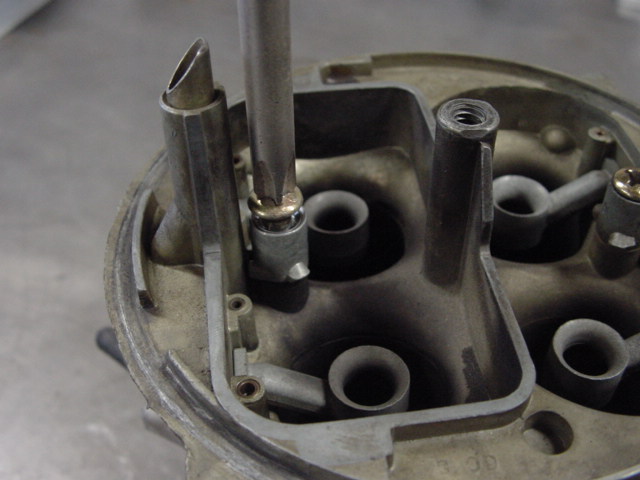
Cup your hand over the screw hole for the squirter and turn the main body upside down.
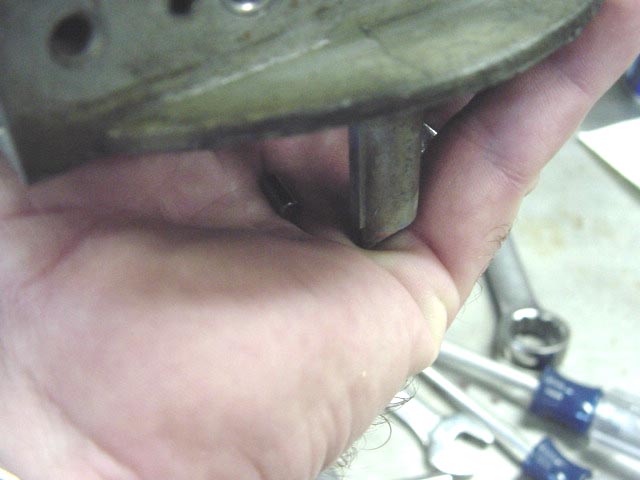
A small, steel cylindrical needle will come out.
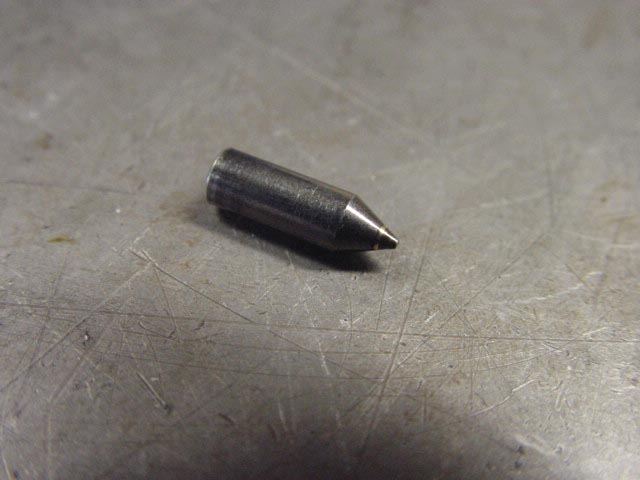
Place this in your small parts tin for safe keeping. Repeat this procedure with the secondary squirter. Remove the choke linkage from the main body as well as the linkage assembly from the primary throttle shaft. Remove the two Phillips head screws from the choke plate (these will be “staked†from the back side and may be hard to remove, take care not to strip the Phillips head) and slide the plate out from the top. The choke shaft may now be removed. Turning the main body over, you will see 6 Phillips head screws.
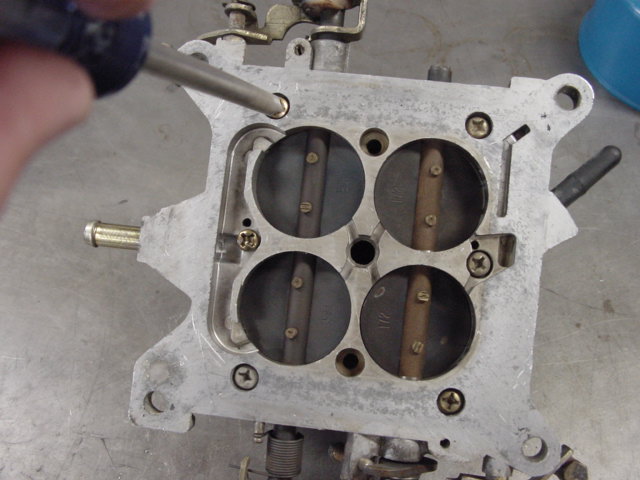
There will be provisions for two more screws in the middle, but these should be empty. More on this in the assembly phase. Remove the six screws with a large Phillips head and separate the throttle plate from the main body. There is no need to remove the throttle blades from the plate. This will be covered in another article on how to boost reference the throttle shafts. Removing the blades is neither a job for the novice builder, nor strictly necessary at lower boost levels anyway.
Preliminary Inspection and Modifications
Once the carb is completely disassembled, preliminary cleaning and inspection can begin. What you want to do here is make sure the metering block gasket and base plate gaskets are free of all old gasket material. Use your putty knife or gasket scraper and brass wire brush to remove all gasket material, gum and varnish. Once these three surfaces are clean, inspection can begin. Things to watch for are deep gouges and excessive porosity. However, the real problem here will be sealing surfaces that are not flat. Generally, Holley HP series carbs and Barry Grant Carbs (Claw Series and Demon Series) will be fairly good in this regard, and the following mod may not be necessary. Skimming the sealing surfaces with a fly-cutter will ensure the gaskets seal under boost, and that air and or fuel will not crossover into an adjacent passage. This step will also eliminate most of the surface porosity. Here we can see the bottom of the main body after fly-cutting
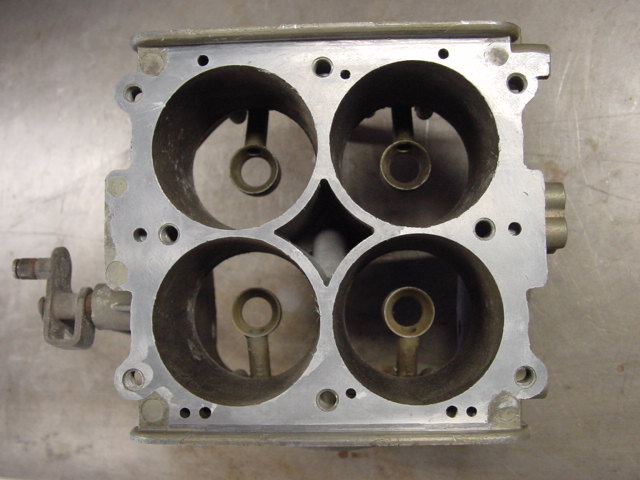
as well as the metering block sealing surface.
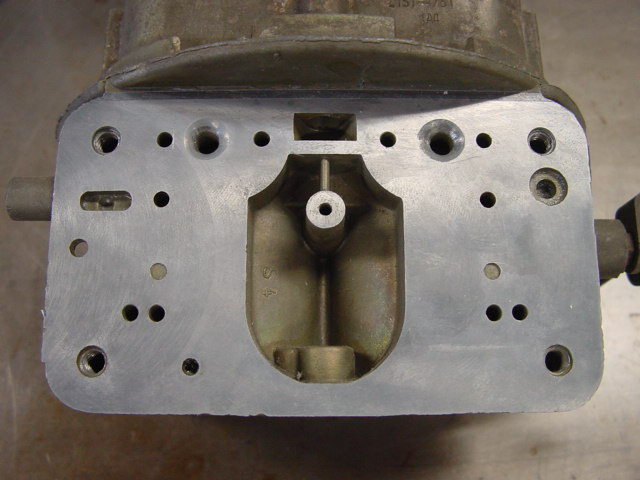
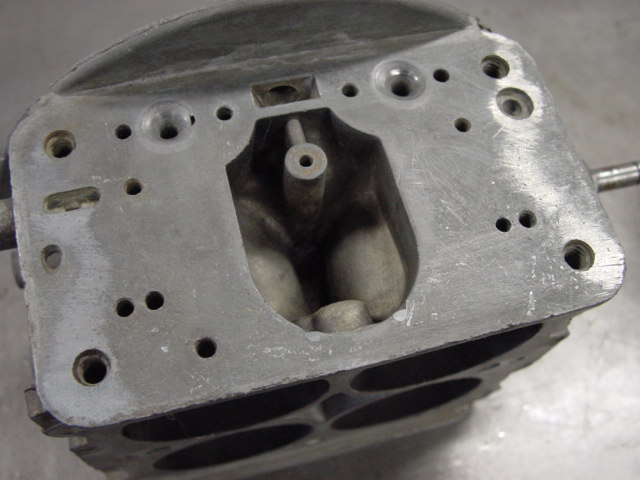
If you do not have access to a mill, you can use a large file to “knock down†most of the high spots so that the gasket has a better chance of sealing across the entire surface.
This is also the time to remove the choke horn, if so equipped
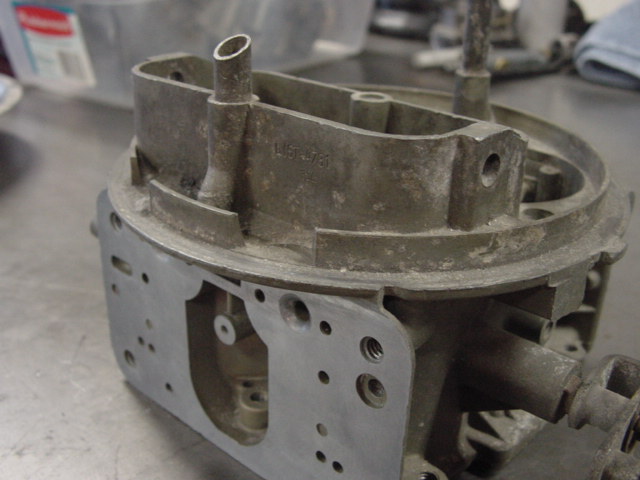
Milling is the best method, but if unavailable, a hacksaw and Dremel rotary tool will suffice. When all the machining operations on the main body are completed, it will look something like this:
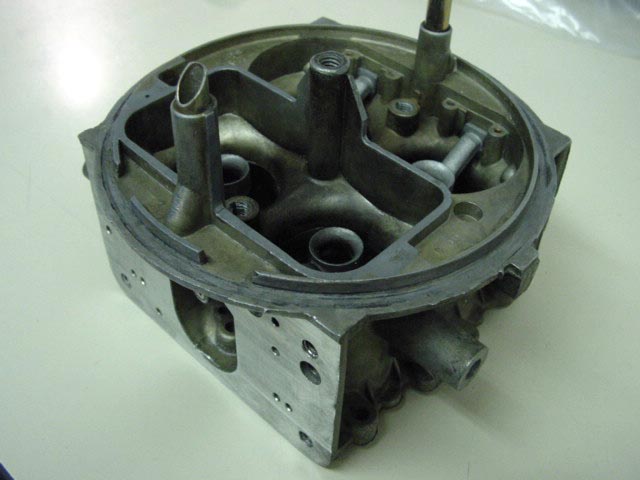
The only modification that will be done to the throttle plate at this time, is to file down the raised area on the secondary side of the plate that is just above the large vacuum port, pictured here:
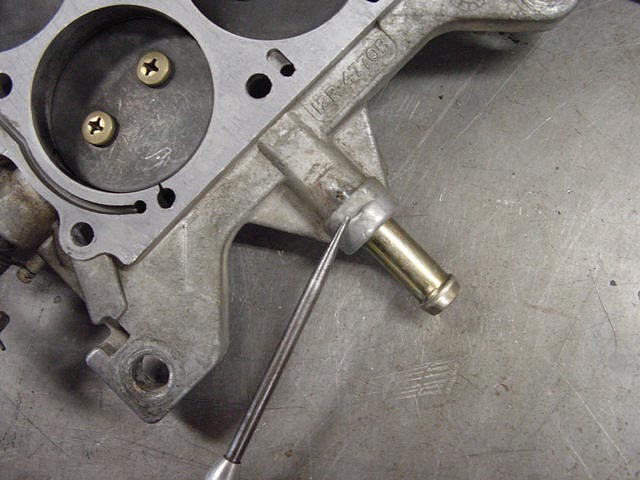
This modification is not for blowthrough, but will make it easier to remove and install the rear float bowl after the jet extensions are installed. Just file the raised area down about 1/16".
We can now begin modifying the metering block. The only passages that we are concerned with are the PVCRs, or Power Valve Channel Restrictions. These are the two holes located directly under the power valve (PV hereafter) sealing surface.
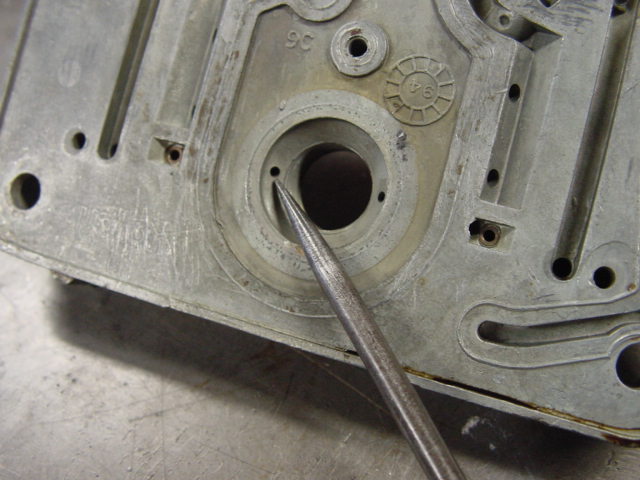
Performing this modification will depend on how much power you are trying to support. Some experimentation may also be required, as this modification is for tuning, rather than a functionality modification. Some of you may opt to get a baseline tune on your carb, before performing this modification as each application is different.
Now for some carb theory. The purpose of the PV is to richen the carb’s mixture when at WOT. Vacuum holds the PV shut at idle and cruise. Once the vacuum is less than the rating stamped on the PV, the valve opens. When the valve is open, fuel from the bowl is allowed to be pulled past the valve and through the PVCRs. The PVCR passages lead into the main well, thus adding fuel to the mixture. The beauty of the system is that the additional fuel is only added under wide open throttle, or in our case, boost. What this modification allows you to do is run less main jet, and at the same time maintain enough fuel flow under boost to keep the air/fuel ratio at a safe level, without having to run a very large main jet all the time. It is akin to increasing the jet size, but only under low vacuum and boost conditions. Also, only the primary side PVCRs need to be modified. The rear power valve (if so equipped) should be blocked, as it can become uncovered during hard acceleration.
You should also note that there are two schools of thought regarding the power valve. Some people do not run a power valve at all, and jet up the carburetor to compensate for not having the additional fuel available at WOT that the PV would normally provide. Proponents of this school usually argue that the power valve is prone to failure after a backfire through the carb. The result will be a carb that runs too rich at idle and cruise (or whenever vacuum is above the rating of the PV). However, if you opt to plug the power valve, it will run that rich all the time! If you do run a power valve and it should fail, the worst that will happen is that the carb will run rich, but it will still maintain the extra fuel flow when under boost. At the very least, I’d recommend keeping the PV and jetting up to compensate. If you remove the PV, you will need to run an additional 8-10 jet sizes higher than that!
You will first need to decide how much to drill the PVCRs. The factory size is generally around .059†You should measure the PVCRs with a wire gauge or decimal drill before drilling for future reference! .078â€(~5/64â€) is probably a good starting point for most cars. The commonly accepted size among tuners making more than 650 horsepower is .094â€(~3/32â€) Keep in mind that while this will increase the diameter of the hole roughly 60%, the area of the hole has been increased by over 150%! Cars with less power may find that they have to run such a small main jet that they get a lean surge during cruise. Remember, this is only a guideline . . . you will still have to decide what jets to use to get a safe air/fuel ratio. Only experimentation at the racetrack or dyno time will tell. If in doubt, get the car running and get a baseline jet size that yields a safe air/fuel ratio, then begin drilling the PVCRs bigger .002†at a time and jetting down until the carb does not run rich at idle or cruise. If you’re still with me, let us proceed with the modification!
Drilling the Power Valve Channel Restrictions
Drilling out the PVCRs is a simple operation. First, take a small paper clip or other round implement, and stick it into one of the holes. Mark the depth of the hole on the clip with a felt tip marker. You will not want to drill any deeper than this depth, so take a piece of tape and wrap it around the drill bit with the side of the tape closest to the point at a distance the same as or less than the distance marked on the paper clip! This is to ensure that you do not drill too far. In fact, you should be all the way through the PVCR before hitting the tape on the drill bit. Now, place the drill bit in your pin vise and slowly drill the existing hole out until you are all the way through and into the main well.
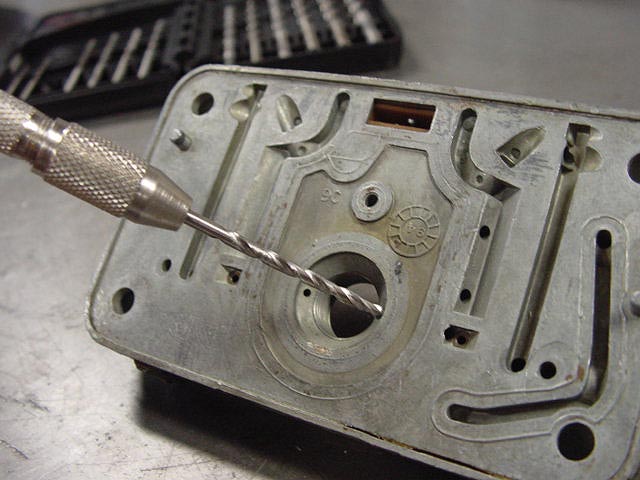
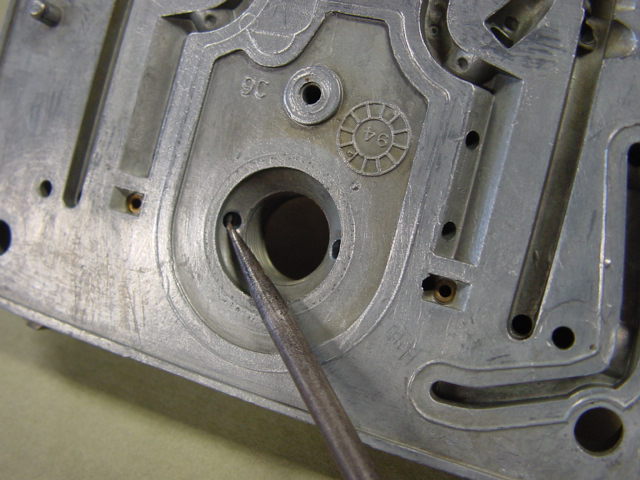
De-burr the outside of the hole and make sure there are no burrs stuck on the edge of the newly drilled hole on the inside of the main well. You can use a small pick to break away any stubborn burrs/chips on the inside of the hole. Now, blow all the chips out of the block and blow compressed air into all the passages to ensure that all the chips from drilling are gone. The owner of this carb is shooting for ~700 HP, so we elected to drill the PVCRs to .094"
Also, it is worth noting that some of the newer Holley carbs come with a "Power Valve Protector"
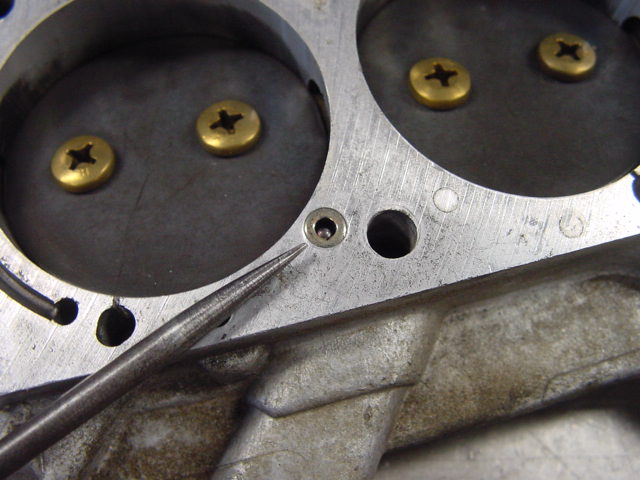
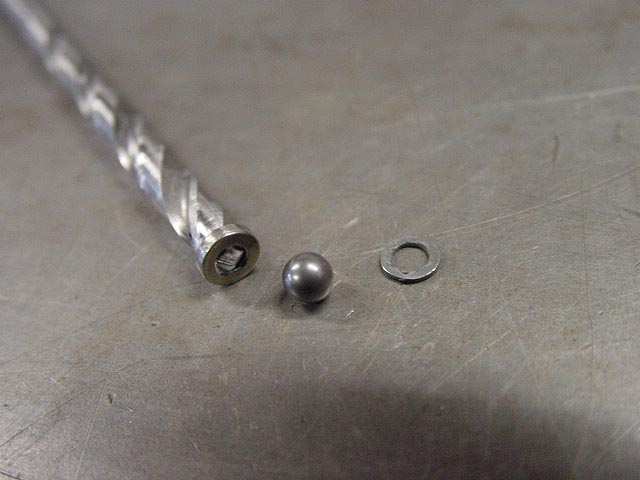
or check ball in the base plate to prevent backfires from rupturing the power valve's diaphragm. This must be removed if the power valve is to function correctly under boost. Simply drill the small retaining plate from the top of the base plate and remove the check ball and washer.
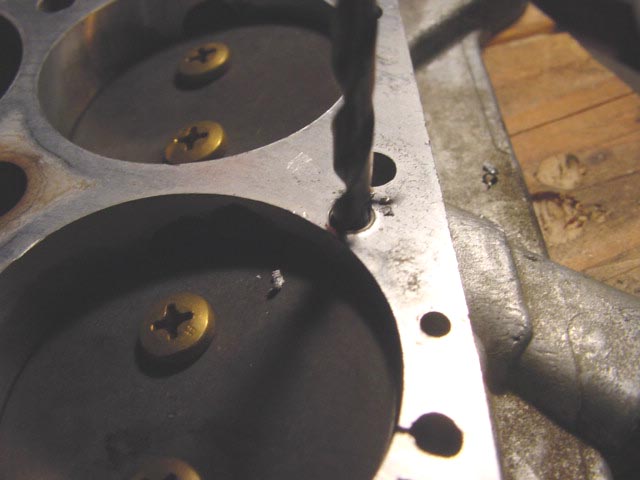
All it takes is slight pressure from the drill to hook the retaining plate and it will come out easily. Be sure to remove all the parts of the power valve protector. You should have the retaining plate (stuck to the drill in the following picture), the check ball, and a small washer
Cleaning
Having completed any machine work, you can begin the real cleaning. The amount of time spent cleaning will depend upon how old the carb is or how well it was maintained. Old crusty carbs will benefit from total submersion in a carb cleaning solution
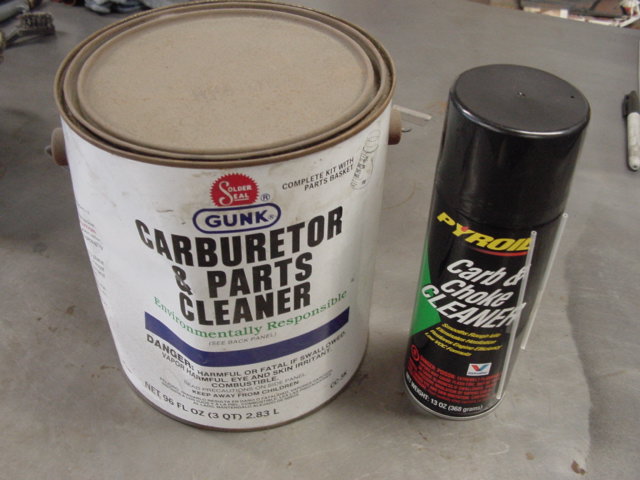
Others will only need a quick spray with carb & choke cleaner and blast of air. Regardless of condition, all sealing surfaces must be free of grime, residue or old gasket material. After soaking or spraying with carburetor cleaner, use a small brass wire brush and a putty knife or gasket scraper to get things clean. Before cleaning any of the small parts, take the time to look at each part individually and inspect for damage. Replace any questionable parts or screws with new pieces. Either
www.braswell.com or
www.summitracing.com has a wide selection of replacement parts.
After removing all the grime, spray each part liberally with carb cleaner to wash away all the crud you’ve dislodged. Once you are satisfied that everything is clean, carefully blow out each passage in the carb with compressed air. Pay careful attention to the small passages in the metering blocks and the air bleeds at the top of the main body. Because these passages are so small, it is quite easy for dirt and other foreign matter to become lodged in a passage.
The next order of business is to block off the hole for the choke linkage. There are a number of ways to do this, but this is how I do it. Clean the area around the hole with brake cleaner, acetone or lacquer thinner. The idea here is to remove any of the carb cleaner residue so the epoxy (or JB Weld) will adhere. Place a small piece of aluminum sheet, approximately 7/16†x 3/4â€, underneath the hole
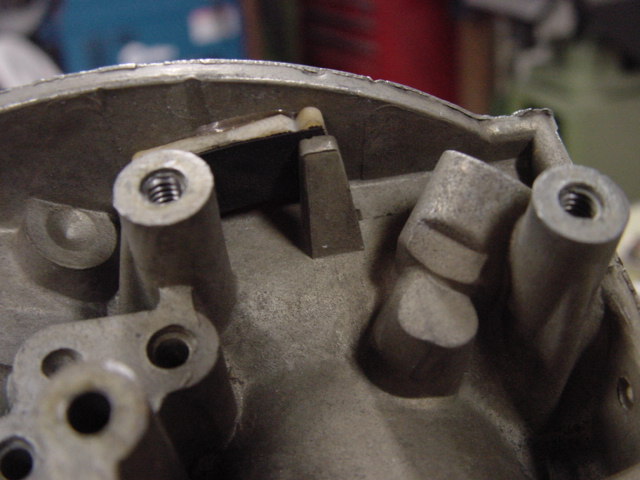
(or a small piece of cardboard, aluminum foil, etc) to prevent the epoxy from dripping through. Mix up your epoxy and drip some into the choke hole. You may find that letting the epoxy set up a bit before filling the hole may be helpful.
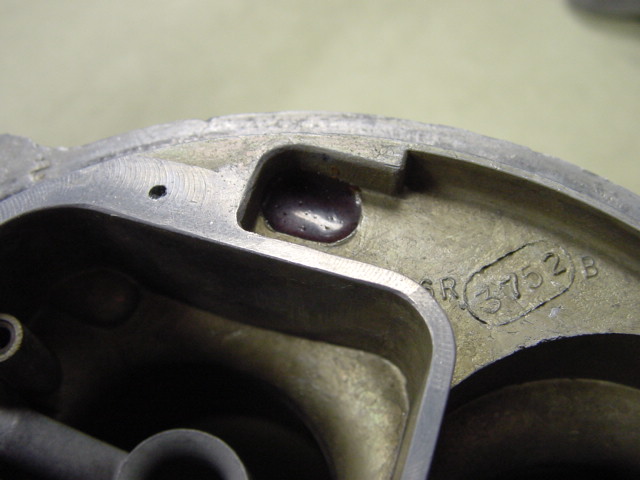
If you opted to use tape or cardboard, you can remove it once the epoxy has dried.
Reassembly
Once all the carburetor parts have been cleaned, inspected, and modified re-assembly can begin. I suggest laying clean paper towels or way paper on you work area to place all the parts on. This will prevent the parts from getting dirty, and make it easier to see any small parts, should you drop them.
Have the old gaskets handy to compare with the new ones. You should also have all your tools, your rebuild kit and some WD-40 within reach. First, place the gasket onto the throttle plate and place the throttle plate onto the bottom of the main body, making sure you have the front of the main body is orientated to the front of the throttle plate. It will go on either way. If you have it on correct, the throttle linkage will be on the right side when looking at the primary side of the main body. Now, place the six Phillips head screws into the front and back three holes in the bottom of the throttle plate. The middle two holes are not used, as the screws may fall into the engine should they become loose.
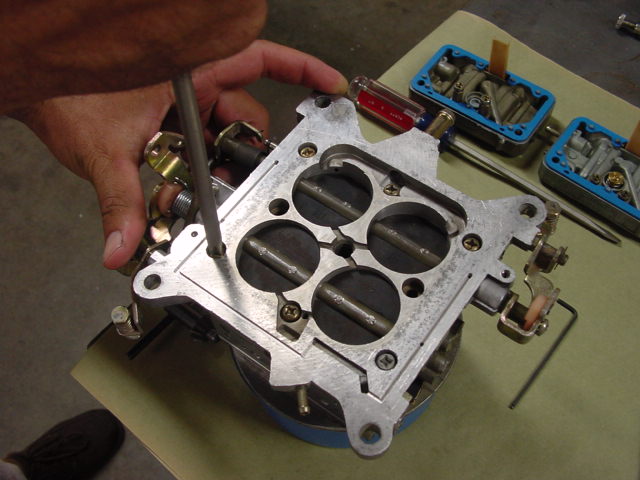
Thread each screw into the main body, and tighten them evenly in a criss-cross pattern. Now, turn the assembly right-side up. Drop the needles into the primary and secondary squirter bosses
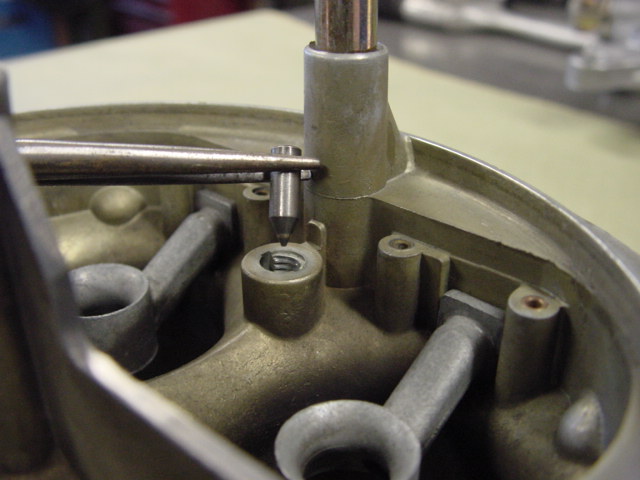
and reinstall the squirters with new gaskets into their respective positions. One gasket goes between the screw and the squirter, and one goes between the squirter and boss on the carb. Now we’ll move on to the metering blocks.
Screw the jets into each of the metering blocks. Before installing the jets into the secondary block, first install the jet extensions that came with the notched float kit
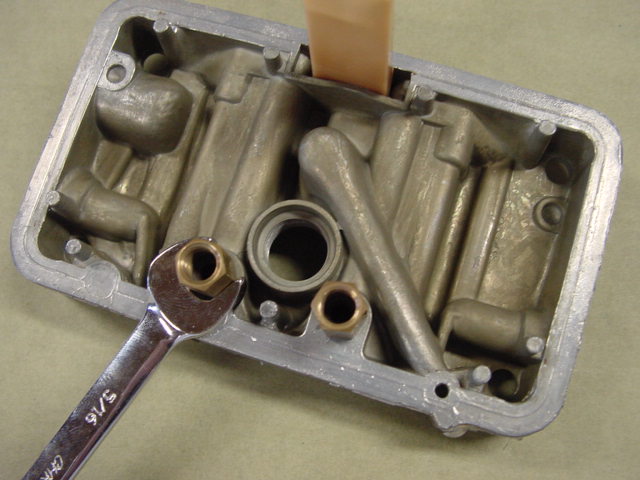
What jet size you go with will depend upon a number of factors, including, but not limited to: Horsepower level, booster signal strength, hat/bonnet configuration, PVCR size, and high speed air bleed size. An increase in jetting of 5-10 jet sizes in both primary and secondary should be considered a minimum. Actual jet size will vary as each application is different! Remember, it is better to be too rich than too lean. Depending upon the size of the PVCRs you will have a difference in jet sizes from primary to secondary of 8 to 20 jet sizes, with the smaller jets in the primary side. With a standard PVCR size, you will want the difference to be in the 8 to 10 range, with the gap getting bigger as the PVCR size increases.
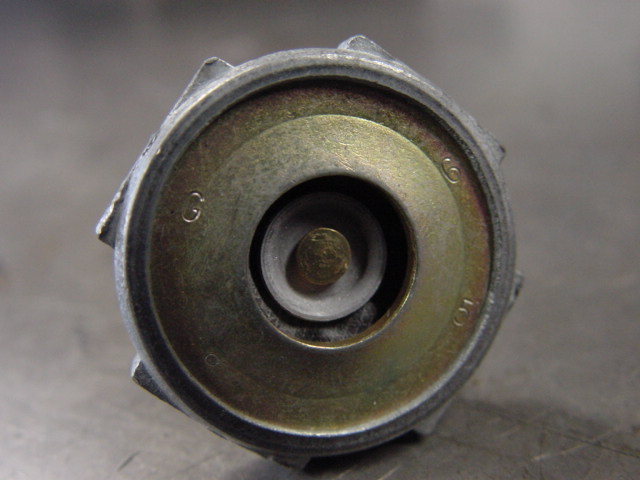
Now, pick up the power valve you will be using and hold it so the side with the spring is facing up. Place a gasket on it, making sure the gasket sits on the flat sealing surface, and is not hung up on the shoulder. Now hold the primary metering block upside –down so you can screw the PV in without disturbing the gasket.
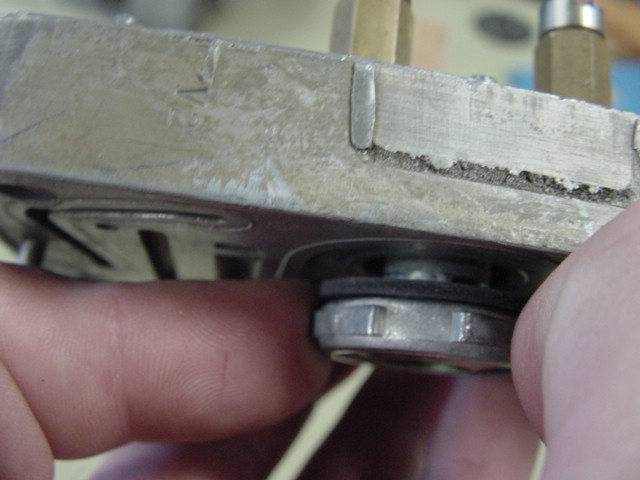
Once the gasket is seated on the metering block, tighten it with a 1†wrench. The power valve rating you use will depend upon how much vacuum your engine makes at idle. You will want to use a PV that is 2-3 in.Hg less than what your engine has at idle. For example, you have 9 in.Hg at idle, you would use a 6.5 power valve. The number is stamped on the diaphragm side of the valve.
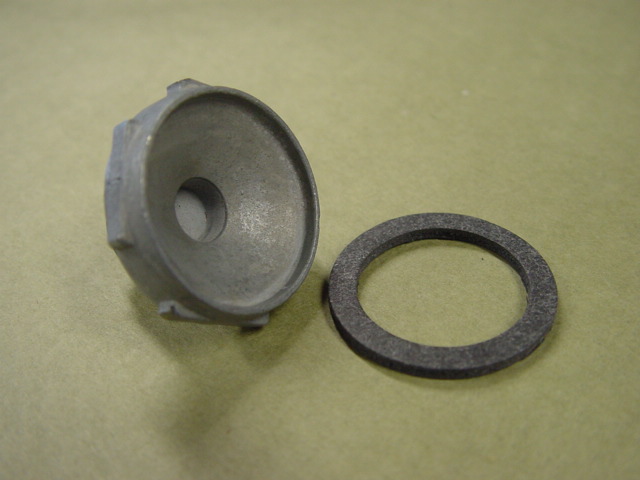
If you have a provision for a PV on the secondary metering block, plug it with a power valve plug, Holley part number 26-36
Dig through your rebuild kit and find the two (or four if you have a four-corner idle carb) small round cork gaskets, pictured here with the idle mixture needles:
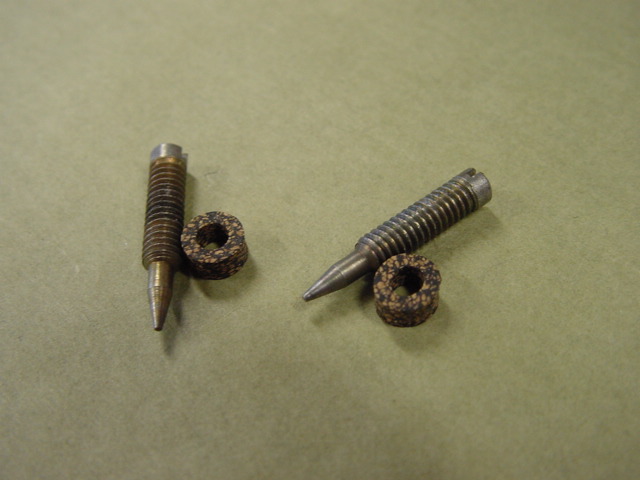
These are for the idle mixture screws. Push them into the holes in the side of the primary metering block (and in the secondary metering block for those of you with four-corner idle).
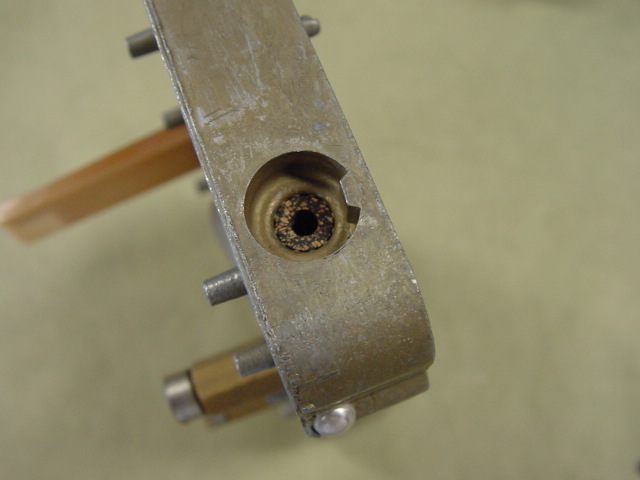
You may have to use the head of a small screw gently push it all the way in. A float bowl screw works nicely. Now, place a mixture screw into the hole in the gasket and use a small flat-blade screwdriver to screw it all the way in until it just seats. Do not be forceful, as the seat in the metering block will damage the needle if tightened too much. You may have to apply a little pressure on the screw when initially installing as the gasket is a tight fit around the screw threads. Once, you have gently seated each needle, back them out 1-1/2 turns for a two-corner idle carb, and 3/4 turn out for a four-corner idle carb. This is the baseline idle mixture setting.
Once everything else is completed on the metering blocks, the only thing left to is to epoxy the main well and idle well plugs, as well as the small pin holding the vent baffle in place. These are located on top of the metering blocks.
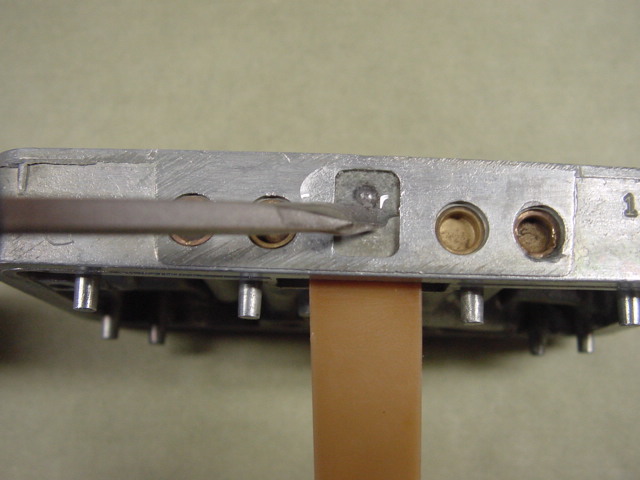
The boost leaks here are usually minimal, but it pays to be thorough. Just mix up some quick-drying epoxy and cover all four plugs and the small pin on each block. There's no need to go crazy with the epoxy, just enough to seal everything up.
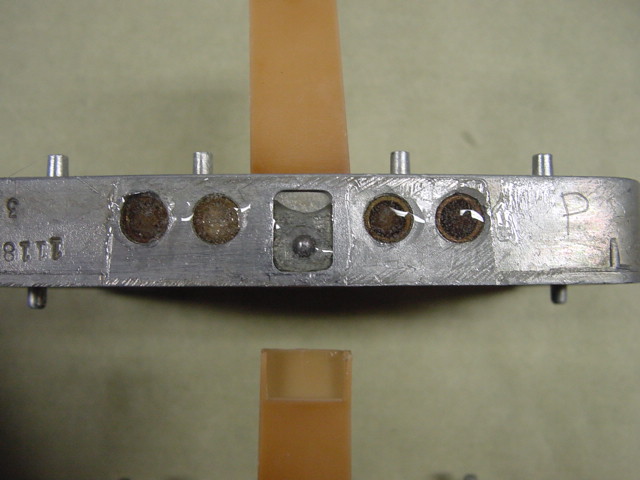
Let the epoxy cure while you work on the rest of the carb.
Let’s move on to the float bowls. Replace your old plastic or brass floats with the new Nitrophyl floats, making sure to assemble them so that when finished, they look like this.
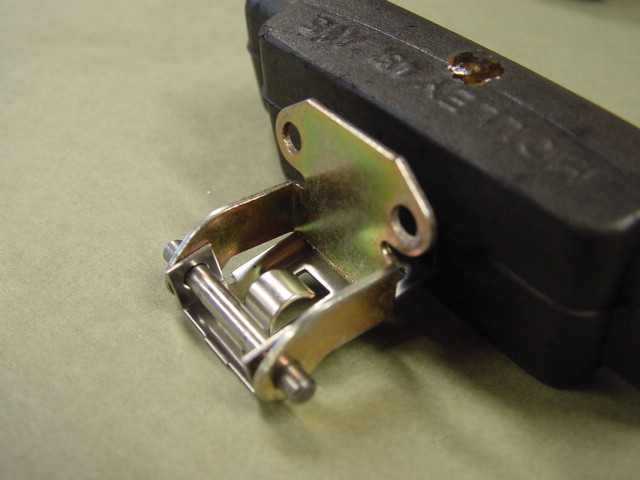
The Nitrophyl floats are solid and will not crush or crack under boost. Screw the float assembly without the notches into the primary bowl. You can differentiate the primary from the secondary by comparing the sight plug holes.
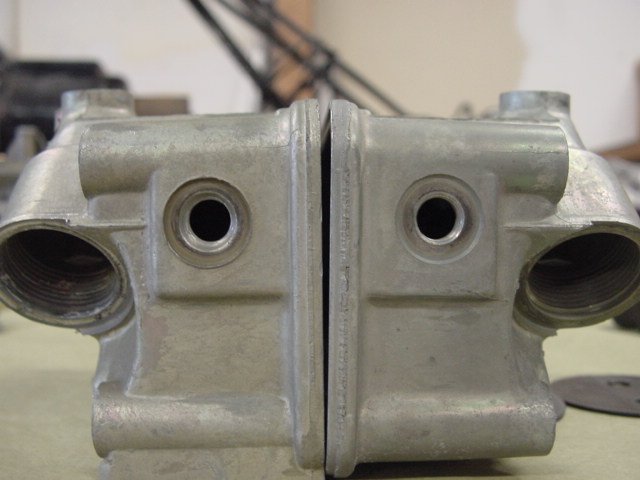
The bowl that has the sight hole higher than the other is the primary bowl. Screw the float with the notches into the secondary bowl. Now, give the o-rings on each needle and seat a quick spray with WD-40 and install into each bowl. Starting with the primary bowl, use the adjusting nut for the needle and seat to screw the needle in so that the top of the float is parallel with the top of the bowl when the bowl is held upside down.
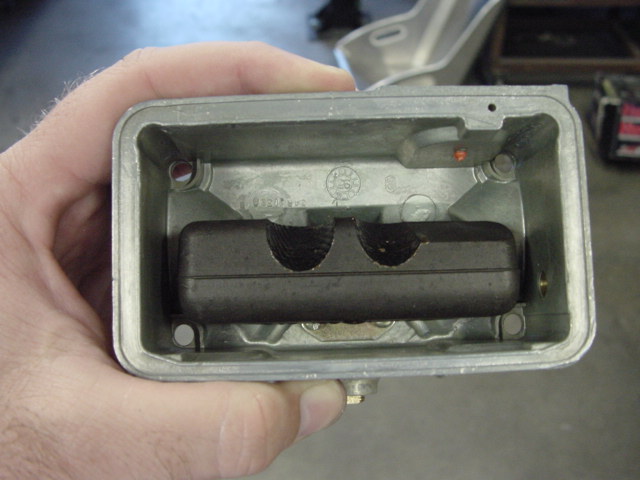
Repeat this procedure for the secondary bowl, but screw the needle in an additional ½ turn. Now you can place the appropriate gaskets on the bowl for the needle and seat adjusting assembly and lock them into place using the wide, flat-head screw.
Next, locate the rubber umbrella seal for the accelerator pump
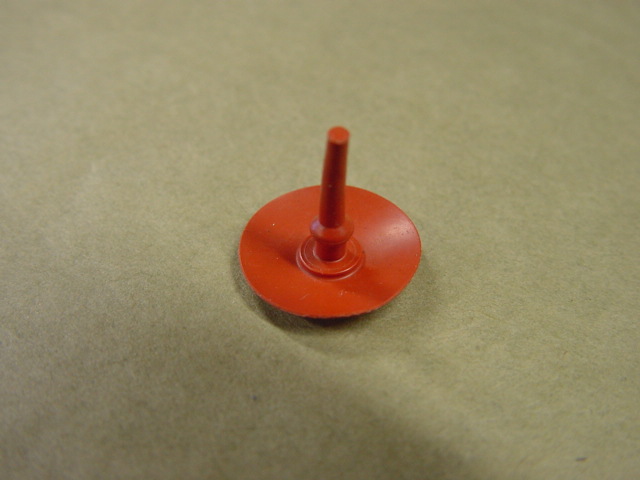
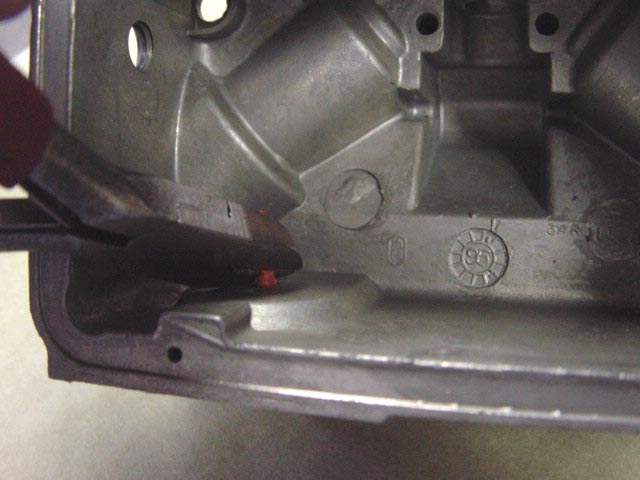
(If your bowls have check balls instead of the umbrella seals, you can skip this step. Just make sure the balls move freely, and have .010-.013 of play) Stick the “tit†through the hole in the bottom of the accelerator pump cavity and pull it through inside the bowl. Cut the extra “tit†off in the bowl so it will not interfere with the float.
Place the spring in the seat in the accelerator pump boss
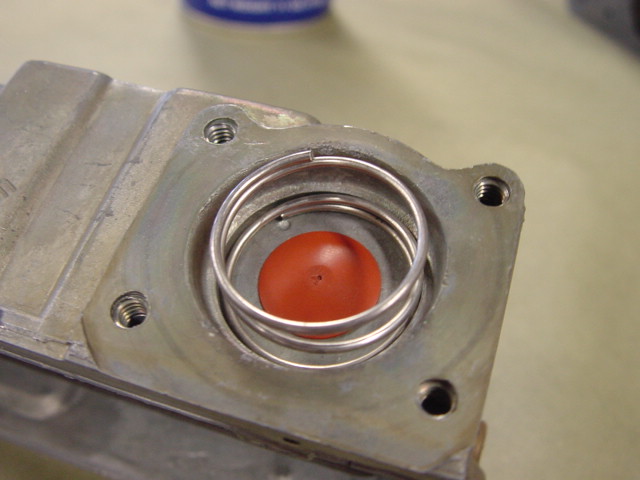
and place the diaphragm on top of it, making sure the spring sits in the metal cup on the diaphragm. Now you can put the pump cover and lever assembly in place and screw it down using the four Phillips screws. Repeat this procedure for each bowl. If you took out the fuel level sight plugs, reinstall them using new gaskets at this time.
Now that the float bowls are assembled, the rest of the carb can be assembled. Find the proper metering block gasket and place it on the metering block.
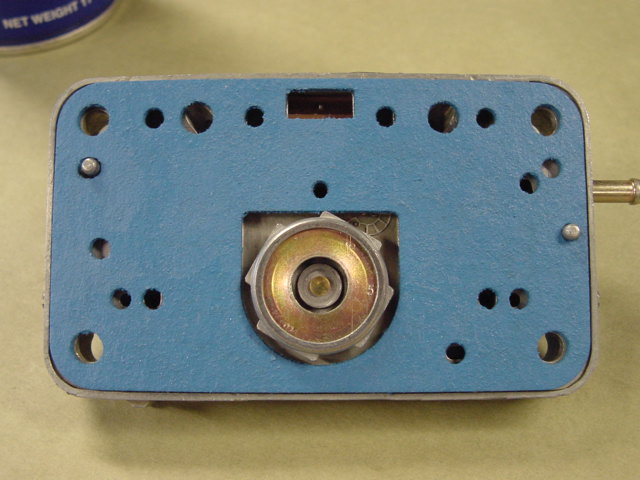
It will only go on one way, as there are two offset locating pins in the block. Place the float bowl gasket on the other side of the metering block (primary and secondary metering block/bowl gaskets are interchangeable).
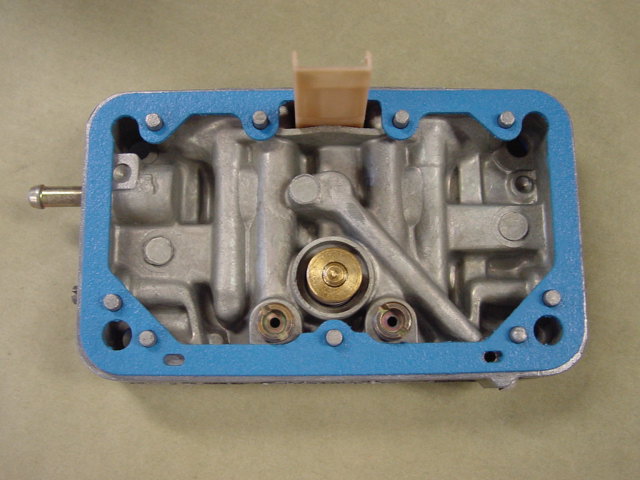
Place a new gasket on each float bowl screw (I recommend nylon bowl screw gaskets over the stock paper type as they generally tear after only one or two jet changes). Place the float bowl on the metering block and hold them in place on the main body and install the four float bowl screws, while at the same time ensuring that the accelerator pump lever and spring are contacting the accelerator pump arm. The easiest way is to hold the bowl/metering block assembly in such a way that your index finger holds the accelerator pump arm against the diaphragm, so that you can use your other hand to hold the pump lever on the base plate against the plastic pump cam. Make sure to tighten the bolts evenly in a criss-cross pattern. After the bowl assembly is assembled, rotate the throttle linkage to wide open. While holding the throttle at wide open, check for free play between the pump lever spring and arm There should be .010-.015†free play so the arm does not bottom out.

If there is too much free play, loosen the nut on the top of the spring assembly until the free play is within spec. If there is not enough free play, or the arm is bottomed out, tighten the nut until the correct amount of free play is achieved. If the spring is compressed all the way, or almost all the way, you will have to bend the pump lever on the throttle plate so that the spring has room to compress. Otherwise, you run the risk of blowing out the accelerator pump diaphragm. Repeat procedure for the secondary bowl.
Congratulations! You have now built and baseline calibrated your carburetor for basic blowthrough operation! Remember, there will be more tuning needed, and there is certainly more to a blowthrough carburetor than outlined here. Other areas of the carb, like idle air bleeds, high speed bleeds and emulsion circuits can all be modified to tweak your fuel curve for optimum performance, but this basic setup will get you started. I highly recommend buying one of the many books available on Holley tuning from
www.amazon.com or
www.barnesandnoble.com. There are a few different books out there, and all are good references. The more you understand and familiarize yourself with your carburetor, the easier it will be for you to tune it.

 Author
Topic: How To Build A Blow Through Carb (Read 10471 times)

